
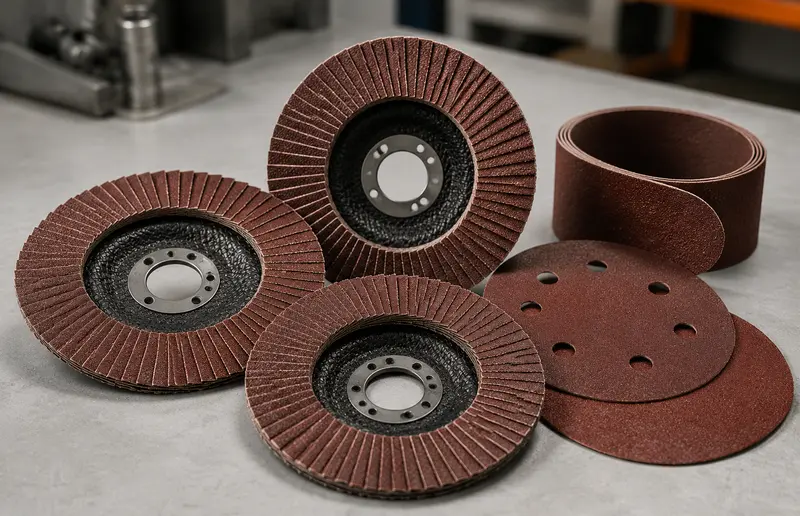
Quick answer: use the coarsest abrasive that removes the actual defect without creating unnecessarily deep scratches, then refine the surface through a controlled sequence. As an indicative starting point, P40–P80 is used for heavy removal, P80–P120 for shaping and initial smoothing, P120–P180 for preparation, and P180–P320 for fine sanding or scuffing. These ranges are not universal prescriptions: the material, existing coating, next finish, machine, abrasive product and manufacturer process determine the final choice.
Sandpaper grit chart: practical starting ranges
| Indicative FEPA range | Typical role | Suitable starting condition | Main risk |
|---|---|---|---|
| P24–P40 | Very heavy stripping or aggressive levelling with an application-rated product | Severe defects or thick material removal | Deep scratches, rapid edge damage and loss of flatness |
| P40–P80 | Heavy removal, shaping or removing old finish | Rough stock, pronounced marks, compatible coating | Starting too coarse on veneer, thin sheet or soft edges |
| P80–P120 | General smoothing and removing coarse scratch patterns | Sawn or previously levelled surface | Leaving visible orbital or cross-grain scratches |
| P120–P180 | Surface preparation and refinement | Minor defects before an approved finish system | Moving finer before earlier scratches are removed |
| P180–P240 | Fine preparation, scuff sanding or between-stage work where specified | Already uniform surface or coating process | Reducing adhesion if the next coating requires more tooth |
| P240–P400 | Very fine scuffing and selected paint, filler or surface-finishing steps | Process specifically calling for a fine scratch profile | Polishing instead of preparing, loading and hidden defects |
| P600 and finer | Specialized wet sanding, clear-coat correction or polishing sequences | Product-specific finishing process | Applying automotive or plastics values to wood or bare metal without validation |
The table is a classification guide, not a promise of finish. Norton’s consumer guidance, for example, places common wood stripping around 40 grit, general sanding around 80, finishing around 120 and finer finishing around 180. A particular stain, varnish, primer, filler or clear coat may require a different final scratch profile. Follow the next product’s technical sheet.
What does a sandpaper grit number mean?
In a single grading system, a lower grit number generally indicates larger abrasive particles and a more aggressive scratch. A higher number generally indicates finer particles and a shallower scratch. The number alone does not describe the complete abrasive. Mineral, grain shape, coating density, backing, bonding resin, anti-loading treatment and product condition all change cutting behavior.
A new ceramic or precision-shaped abrasive at a given grade may cut differently from a worn conventional sheet carrying a similar printed number. Likewise, a stiff fibre disc, flexible cloth belt, foam-backed disc and hand sheet do not put the same pressure distribution into the surface. Compare complete products intended for the operation rather than purchasing from grit alone.
Coarse does not automatically mean faster overall
A very coarse abrasive removes material quickly at first, but the deep scratch pattern may demand several extra refinement steps. On thin veneer, a coarse start can create irreversible damage before the surface appears flat. The efficient starting grade is the least aggressive one that removes the defect in a reasonable, controlled time.
Fine does not automatically mean ready for finish
Excessively fine sanding can reduce the texture required by some coatings, glaze certain materials or leave old scratches beneath a temporarily smooth-looking surface. Final grit should be chosen with the stain, oil, varnish, primer, paint, adhesive or polishing system that follows.
FEPA P-grit, CAMI and proprietary grades
FEPA states that coated abrasives use P-grit designations, while bonded abrasive products use F-grit. The “P” on P120 therefore carries useful information: it identifies the FEPA coated-abrasive grading family. Other markets and product technologies can use CAMI/ANSI designations, micron values, mesh descriptions or proprietary grades.
Numbers from different systems are not guaranteed to be particle-for-particle equivalents, especially as grades become finer. Do not silently remove the “P” or replace a proprietary foam-disc grade with a conventional paper number. When mixing brands or systems in one progression, use the manufacturers’ conversion or process chart and verify the scratch on a test surface.
Non-woven grades are not ordinary grit numbers
Non-woven pads and discs are often described with terms such as coarse, medium, fine or very fine. Their open web, mineral distribution and conformability create a different surface from coated paper. A color or grade name is not a universal conversion to P180 or P320. Use the exact product comparison chart where a controlled appearance matters.
Which grit should you use by material?
| Material | Removal | Preparation | Fine finishing | Critical precaution |
|---|---|---|---|---|
| MDF | P40–P80 indicative | P100–P150 indicative | P180–P240 indicative | Use extraction and light pressure; compact faces and porous edges respond differently |
| Plywood or veneer | P60–P80 only when necessary | P100–P150 indicative | P180–P240 indicative | The face veneer may be extremely thin; protect edges and corners |
| Solid wood | P40–P80 indicative | P100–P180 indicative | P180–P320 depending on finish | Sand with the grain at the final stage and follow the coating maker |
| Aluminium | P60–P100 indicative | P120–P180 indicative | P180–P320 or compatible non-woven | Use a non-ferrous-rated, anti-loading product and control heat |
| Carbon steel | P40–P80 indicative | P80–P150 indicative | P150–P320 or metal-rated non-woven | Use media rated for the machine and remove oil, loose particles and dust |
| Stainless steel | P60–P100 indicative | P100–P180 indicative | P180–P320 or stainless-rated non-woven | Keep abrasives dedicated to stainless to reduce ferrous contamination |
These ranges mirror the conservative classes used by the MatchMyTools grit selector. They deliberately overlap because surface condition matters more than a rigid boundary. Open the abrasive grit-selection calculator to filter the range by material and objective, then validate it against the abrasive and finish manufacturers.
MDF
MDF creates fine abrasive dust and loads some products quickly. Keep the sander flat and use only enough pressure to maintain control; pressing harder can heat the surface, clog the disc and hollow softer areas. The factory face is denser than a machined edge, so they may need different preparation and sealing processes.
Plywood and veneer
The top veneer can be thinner than the defect you are trying to remove. Start finer than you would on thick solid wood when possible, mark the surface lightly to monitor coverage and reduce pressure near edges. Once the veneer is sanded through, a finer grit cannot restore it.
Solid wood
Rough-sawn boards, planer marks and an already smooth furniture component do not share a starting grade. Work through the existing defects, then make the final hand passes with the grain where practical. Norton notes that the ideal final grade varies with wood species and whether the next stain is water- or oil-based, which is why the finish system must determine the stopping point.
Paint, primer and filler
First identify whether the goal is stripping, feathering an edge, shaping filler, preparing primer or sanding between coats. Those are different processes. Coating age, chemistry, film thickness and manufacturer repair procedure can shift the range by several grades. Use a guide coat where the process specifies one so deep scratches and low spots remain visible.
Aluminium
Soft aluminium can load a conventional abrasive and smear across the surface. Select a product explicitly intended for non-ferrous metal and stop when the face loads instead of adding pressure. Keep the work supported and control heat; a clogged abrasive does not become effective again merely because it still feels rough.
Steel and stainless steel
Use a product rated for the metal, the sanding machine and the intended operation. Stainless media should remain separate from carbon-steel media when surface contamination matters. Reproducing a brushed appearance requires consistent direction, pressure, overlap and abrasive condition—not only the same printed grade. For angle-grinder finishing, also consult the stainless grinding-disc guide.
Abrasive minerals, backings and formats
| Type or construction | Typical characteristic | Useful application question | Do not assume |
|---|---|---|---|
| Aluminium oxide | General-purpose coated abrasive available for wood, paint and metals | Is the exact product rated for the material and dry/wet use? | Every aluminium-oxide sheet has the same life or cut |
| Zirconia alumina | Tough self-renewing grain often used for demanding stock removal | Does the machine and pressure level let the product cut as designed? | It is the best choice for light fine sanding |
| Ceramic or precision-shaped grain | Engineered cutting geometry for high cut and useful life in rated tasks | Which backing, speed and application does the product require? | Its printed grade behaves identically to every conventional sheet |
| Silicon carbide | Sharp mineral common in selected finishing and wet/dry products | Is the reference approved for the substrate and fluid? | “Wet-and-dry” authorizes every liquid or power tool |
| Open-coat or anti-loading product | Spacing or treatment intended to reduce clogging | Does it suit resinous wood, paint or soft non-ferrous metal? | It cannot load or overheat |
| Non-woven abrasive | Conformable open web for cleaning, blending and surface conditioning | Which exact grade reproduces the required appearance? | Color is standardized across every manufacturer |
Backing matters as much as mineral. Paper is common for sheets and discs; cloth offers flexibility and tear resistance for belts and contours; film can support a uniform fine finish; foam conforms to profiles and spreads pressure. Hole pattern, attachment method, disc diameter, belt dimensions and maximum operating speed must match the machine and pad.
How to build a sanding progression
- Define the next process: bare wood finish, paint, adhesive, plating, brushed metal or polishing all need different final surfaces.
- Identify the deepest defect: saw marks, old finish, dent, filler edge, oxidation or previous sanding scratch.
- Test the least aggressive practical start: use a representative offcut or discreet area and inspect after a short controlled pass.
- Complete the first grade: remove the target defect evenly instead of leaving islands that the next grade cannot correct efficiently.
- Clean and inspect: remove dust, mark the surface if appropriate and use raking light to reveal scratches.
- Choose the next grade from the product system: avoid a jump so large that the finer abrasive only polishes the peaks while deep scratches remain.
- Change the scratch direction where the process allows: a different hand-sanding direction or guide coat can make the previous pattern easier to see.
- Stop at the specified final grade: do not continue finer merely because more grades are available.
- Record the sequence: note product line, grade system, machine, speed setting, interface pad, dust extraction and result.
Rules such as “never skip more than one grit” or “multiply the number by 1.5” can be useful reminders inside a known product family, but they are not international standards. Product technology and grading system can change the size of the jump. The abrasive manufacturer’s sequence is the safer authority.
Hand sanding, random orbital or belt sander?
Hand sanding and sanding blocks
Hand sanding provides control near edges and profiles. A firm block helps preserve flatness; a soft interface follows contours but can round details. Folded paper without a block concentrates finger pressure and can create grooves. Use the backing and hand pad recommended for the product, and replace torn or loaded sheets.
Random orbital sanders
A random orbital sander combines rotation and orbit to reduce a single-direction scratch, but it can still create pigtails, swirls and edge damage. Align extraction holes, keep the pad flat before applying pressure and let the abrasive cut. A contaminated pad, trapped particle or abrupt placement can produce a scratch much deeper than the surrounding grit pattern.
OSHA describes perforated sanding pads connected to an aspirator as a dust-control method for random orbital sanders. Use the machine manufacturer’s pad, disc diameter, attachment and speed instructions; extraction effectiveness depends on correct hole alignment and airflow.
Belt sanders
Belt sanders remove material quickly and can ruin a flat surface just as quickly. Confirm belt dimensions and running direction where marked, start with the machine supported and keep it moving. Avoid tipping the platen, dwelling at an edge or using a coarse belt to correct a small isolated defect without a plan.
Wet or dry sanding
Use liquid only when the abrasive, workpiece, machine and process explicitly permit wet sanding. Water around a power tool is not automatically safe, and some materials, coatings and dust collectors are incompatible with wet use. For hand wet sanding, use the specified lubricant, manage slurry and prevent contamination of subsequent coatings.
Why do scratches, swirls and loading remain?
- Deep scratches survive the next grade: the progression jumped too far, the previous stage was incomplete or a contaminant created a deeper line. Return only as coarse as needed and re-establish a uniform scratch.
- Random pigtails: clean the work and disc, inspect extraction, pad and interface, then check for a trapped particle or loaded abrasive. Do not press harder.
- Uneven stain absorption: the surface may have mixed scratch grades, glue, burnishing or species-dependent density. Test the complete finish on representative scrap.
- Edges become rounded: reduce pressure, use a suitable block or firmer interface and protect the edge during powered sanding.
- Disc clogs quickly: confirm mineral and coating for the material, improve extraction, reduce heat and replace the disc when its face is loaded.
- Surface becomes hot or discolored: stop, reduce pressure, check abrasive sharpness and product speed, and improve the approved cooling or evacuation method.
- Finish peels or lacks adhesion: the final scratch may be too fine, contaminated or incompatible with the coating. Follow the coating preparation specification rather than guessing from appearance.
- Visible bands on brushed metal: keep direction, overlap, pressure, speed and abrasive condition consistent; replace media before its changed cut produces a new texture.
Dust and safety checks before sanding
- Identify the substrate and every existing coating before creating dust. Old paint, treated wood, fillers and metals can require special controls.
- Use the respiratory, eye, hearing and skin protection specified by the machine, abrasive, coating and workplace instructions.
- Connect suitable dust extraction where required and keep disc holes aligned with the pad. Do not defeat guards, shrouds or collection ports.
- Inspect the backing, belt joint, hook-and-loop face, pad and attachment. Do not use torn, damp, damaged or incorrectly sized media.
- Secure the workpiece and route the power lead and extraction hose away from the sanding path.
- Use only the abrasive formats and speeds approved for the machine. A hand sheet is not automatically a power-tool disc.
- Keep metal-sanding sparks and hot particles away from combustible material and from dust-extraction equipment not expressly designed for that hazard.
- Stop if the abrasive loads, tears, shifts, overheats or produces unusual vibration. Disconnect or isolate the machine before changing media.
Frequently asked questions
What sandpaper grit should I start with?
Start with the least aggressive grit that removes the actual defect in a controlled time. P40–P80 is an indicative range for heavy removal, P80–P120 for smoothing and P120–P180 for preparation, but veneer, existing paint and an already smooth surface may require a finer start. Test first and follow the abrasive and finish manufacturers.
What grit should I use before painting wood?
There is no universal final number. P120–P180 is a common preparation range, while some systems call for a different scratch profile depending on wood, primer or paint. Remove all earlier scratches, dust and contamination, then stop at the grade specified by the coating manufacturer rather than sanding as fine as possible.
Can I go directly from 80 grit to 220 grit?
Usually that is a large jump for conventional sanding because P220 may not efficiently remove every P80 scratch. An intermediate P120 or P150 step is commonly more controlled. However, progression depends on the grading system and abrasive technology, so use the product manufacturer’s sequence and verify under raking light.
Is P grit the same as ordinary sandpaper grit?
Not always. The P prefix identifies the FEPA coated-abrasive grading family. CAMI/ANSI numbers, micron grades and proprietary products can use different particle distributions, particularly at finer grades. Keep the prefix and consult a manufacturer conversion chart before mixing systems.
Why does my orbital sander leave swirl marks?
Common causes include a trapped particle, loaded or damaged disc, excessive pressure, tilted pad, poor extraction, moving too fast or skipping a refinement step. Clean and inspect the surface, pad and abrasive, align extraction holes, keep the machine flat and reproduce the progression on a test area.
Technical sources
- FEPA — Abrasive grain standards and P-grit designation
- Norton Abrasives — Choosing sandpaper by task and material
- Norton Abrasives — Bare-wood progression and finish considerations
- 3M — Scratch control, guide coat and dust extraction
- OSHA — Wood-dust control for random orbital sanders
The stated parameters are starting points. Test progressively on scrap and always respect manufacturer limits.