
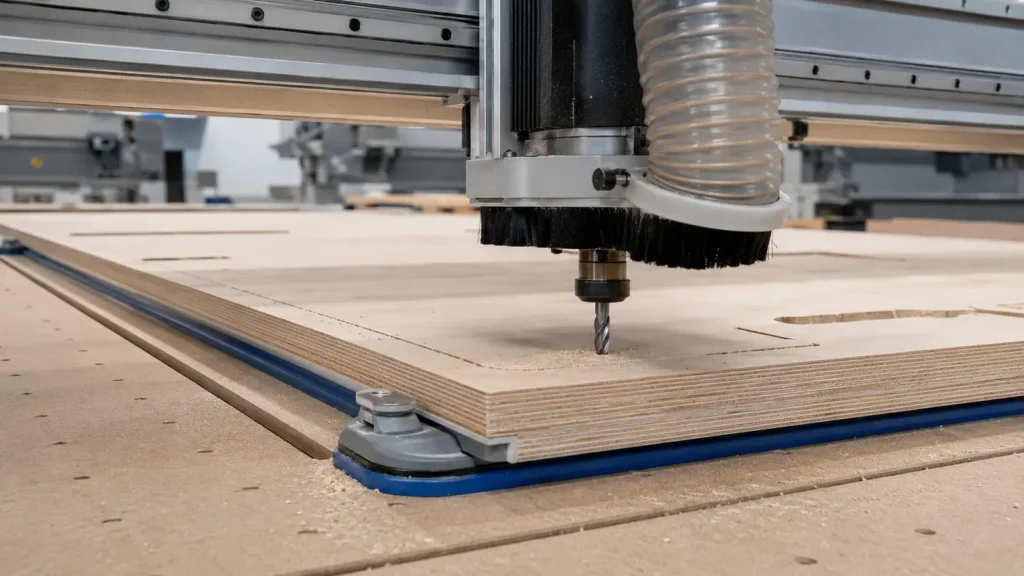
Plywood rewards the right cutter and exposes the wrong one quickly. Its thin face veneers can splinter, its alternating plies change grain direction throughout the cut, and glue lines add wear. The best router bit therefore depends less on a single product name than on the face you need to protect, whether the cut passes through the sheet, how effectively chips can escape and whether you are using a CNC router or a handheld router.
Quick answer: For a full-depth profile where both faces must remain clean, use a sharp solid-carbide compression spiral bit, provided the entire upcut section is below the top veneer. For a dado, pocket or blind slot where the top face matters most, a downcut spiral is usually the safer choice. For deep cuts where chip evacuation matters more than the top veneer, choose an upcut spiral. A straight bit remains useful for occasional work, but it is not normally the first choice for the cleanest plywood edges.
Which router bit should you use for plywood?
| Job | Good starting choice | Main advantage | Main limitation |
|---|---|---|---|
| Through-cut with both faces visible | Compression spiral | Protects the top and bottom veneers | The upcut section must be fully buried below the top face |
| Dado, groove or shallow pocket | Downcut spiral | Leaves a cleaner top edge | Pushes chips into the cut and may require shallow passes |
| Deep slot or pocket | Upcut spiral | Pulls chips out efficiently | Can lift or fuzz the top veneer |
| Occasional general routing | Sharp straight bit | Affordable and widely available | Usually produces more edge impact than a spiral cutter |
| Dado sized to fit plywood | Undersized plywood dado bit | Can match the panel’s measured thickness | Nominal thickness alone is not reliable |
This table narrows the choice, but it does not replace the tool manufacturer’s application data. Plywood quality, veneer thickness, core gaps, bit condition, spindle runout, workholding and dust extraction can all change the result.
Why plywood is different from solid wood and MDF
Plywood is built from thin veneers bonded in alternating grain directions. That construction makes panels stable and strong, but it also means a router bit repeatedly enters cross-grain and long-grain material while passing through abrasive glue lines. The face veneers are often much thinner than the internal plies, so a small amount of lifting at the surface can become a visible chip.
The panel itself also matters. Cabinet-grade birch plywood with consistent plies normally routes more predictably than low-grade construction plywood containing gaps, knots or uneven cores. No cutter can repair an internal void. A clean outer edge does not prove that the core is defect-free.
Before choosing the tool, answer four questions:
- Is the cut through the sheet, or is it a blind groove or pocket?
- Which face will remain visible after assembly?
- Can the machine and extraction system remove chips from the cut?
- Is the workpiece held firmly enough for the cutting direction?
Upcut, downcut or compression: what changes?
The flute direction controls both chip movement and the direction of force on the surface veneers. For a fuller geometry comparison, see Upcut, downcut or compression: how to choose.
Upcut spiral bit
An upcut spiral carries chips toward the router or spindle. That action is valuable in deep slots, pockets and mortises because recutting trapped chips creates heat and degrades the finish. The trade-off is an upward force on the top veneer. On plywood, that can produce fuzzing or small chips along the upper edge, especially when the bit is dull or the face veneer is fragile.
Choose an upcut when evacuation is the priority, the bottom face matters more than the top, or the upper edge will be trimmed later. Secure workholding is essential because the cutter can also pull upward on the panel.
Downcut spiral bit
A downcut spiral pushes fibres and chips downward. It normally protects the visible top veneer and can also help keep a CNC workpiece pressed against the spoilboard. It is well suited to shallow dados, grooves and pockets where the top surface is the main cosmetic face.
The disadvantage is restricted chip evacuation. Chips can accumulate in a deep groove, increase heat and recut against the edge. Use effective extraction, avoid unnecessarily deep passes and stop if the cutter begins producing dark dust, burning, smoke or abnormal sound.
Compression spiral bit
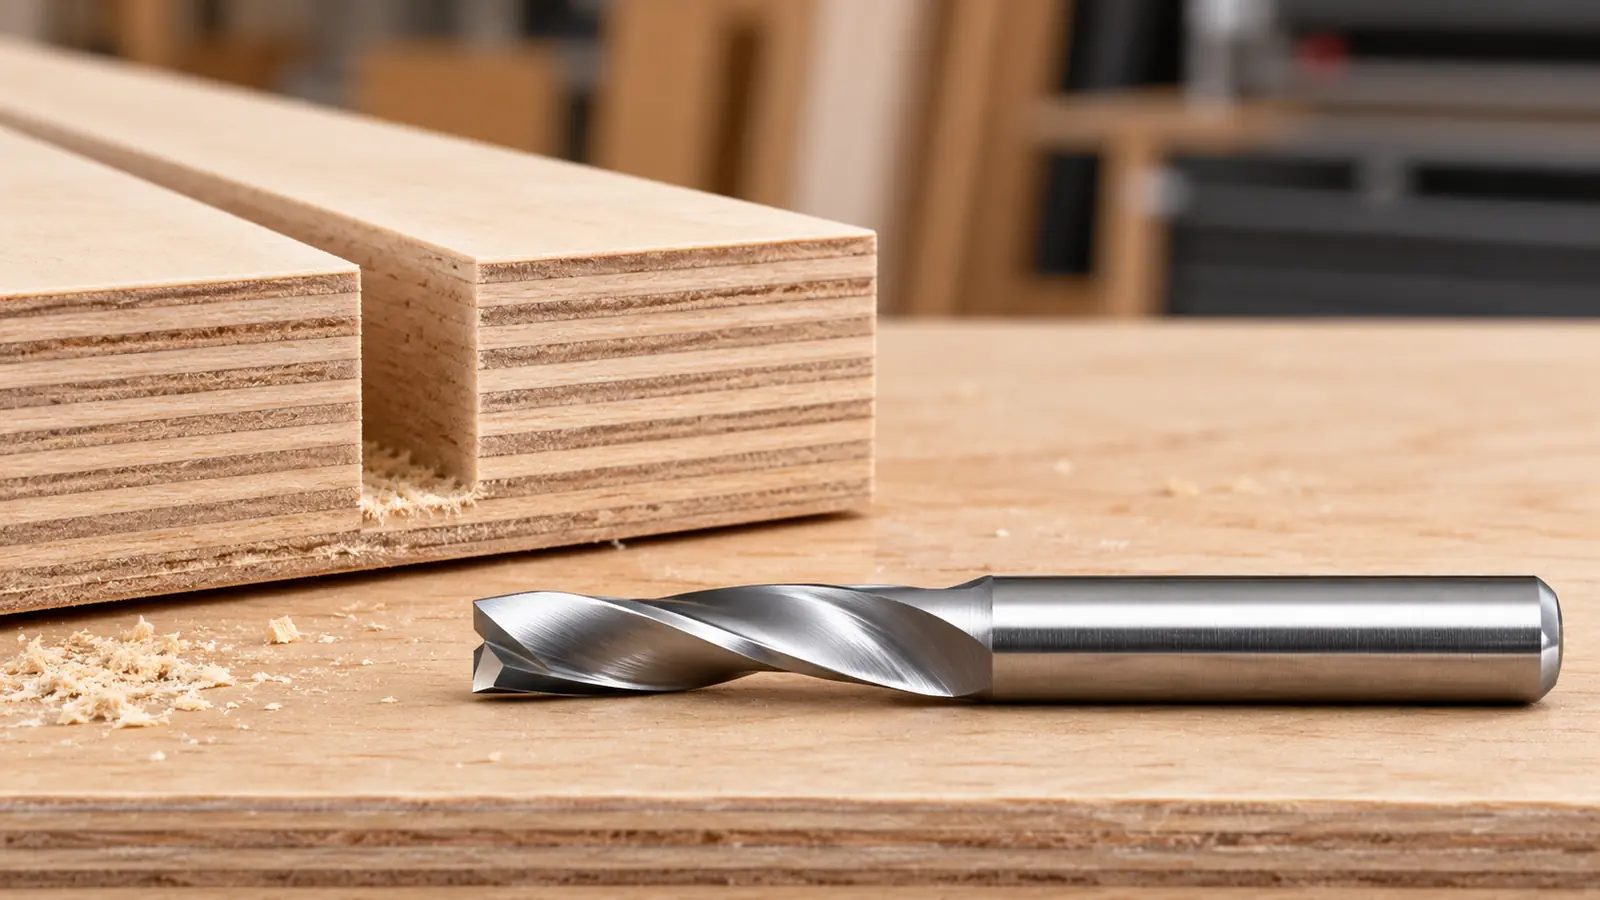
A compression bit combines a short upcut section at the tip with a downcut section above it. When the bit is positioned correctly in a through-cut, the lower section pushes the bottom veneer upward while the upper section pushes the top veneer downward. The cutting forces meet inside the panel, helping protect both faces.
The important condition is engagement. The first pass must be deeper than the full upcut length. If the upcut section still crosses the top veneer, the tool behaves like an upcut at that surface and may chip it. Check the manufacturer’s drawing; do not estimate the transition from a product photograph.
For thin material or shallow grooves, a standard compression bit may be unsuitable because the required first-pass depth is too large. A mortise-compression design has a shorter upcut section and may be a better fit, but only when its dimensions and machine requirements match the operation.
Straight bit
A sharp carbide straight bit can cut plywood and remains useful for template work, dados and occasional routing. Its cutting edges meet the veneer more abruptly than a continuous spiral edge, so a spiral bit is generally preferred when edge quality and evacuation are critical. A straight bit is not automatically wrong; it is simply a less specialized choice.
Choose the bit by operation
Full-depth profile cutting
For cabinet parts, signs and components where both faces remain visible, a compression spiral is usually the strongest starting choice. The panel must be supported and restrained throughout the cut. On a CNC router, leave tabs, use an onion-skin strategy or provide sufficient vacuum hold-down so the part cannot move during the final pass.
An onion-skin strategy leaves a thin layer at the bottom during the main cut, followed by a shallow final pass. It can improve part stability, but that last pass still needs the correct flute action at the bottom face. Test the sequence on scrap before applying it to finished material.
Dados and grooves
For a groove that does not pass through the panel, the top veneer is normally the only visible surface. A downcut spiral is therefore a practical choice when the groove is shallow enough for good evacuation. For a deeper groove, use multiple passes and remove accumulated chips between passes if extraction is limited.
Measure the plywood with calipers before selecting a dado bit. A sheet sold as 3/4 inch may be thinner than 0.750 inch, and nominal 1/2-inch or 1/4-inch panels may also differ from their labels. An undersized plywood dado bit can be helpful, but the joint should be based on the measured panel, not the nominal name.
Pockets and mortises
Deep pockets favour an upcut because chips have a clear route out of the cavity. If the top surface must remain pristine, a shallow downcut entry followed by another strategy may be possible on a CNC, but it increases programming and verification requirements. A purpose-designed mortise compression bit can also help where its short upcut length is compatible with the first pass.
Template routing and flush trimming
Use a bearing-guided flush-trim or pattern bit with enough cutting length for the workpiece and template, but no more length than necessary. The bearing position must match whether the template sits above or below the panel. Spiral flush-trim bits can improve the shearing action, but the template, bearing and workpiece must remain firmly controlled.
Edge profiles and joinery
Roundover, chamfer, rabbeting and dovetail bits are selected primarily by the required profile. For exposed plywood edges, use a sharp cutter, take light finishing passes and support fragile face veneers. Decorative veneered plywood may need a test cut because the outer veneer can be much thinner than expected.
CNC router versus handheld router
Using a CNC router
A CNC can hold a repeatable toolpath, but it does not compensate for poor fixturing. Confirm spoilboard flatness, collet condition, tool runout, extraction and part hold-down before adjusting feeds and speeds. A downcut can help press the workpiece toward the table, while an upcut can apply lifting force. Neither geometry replaces clamps, vacuum or tabs.
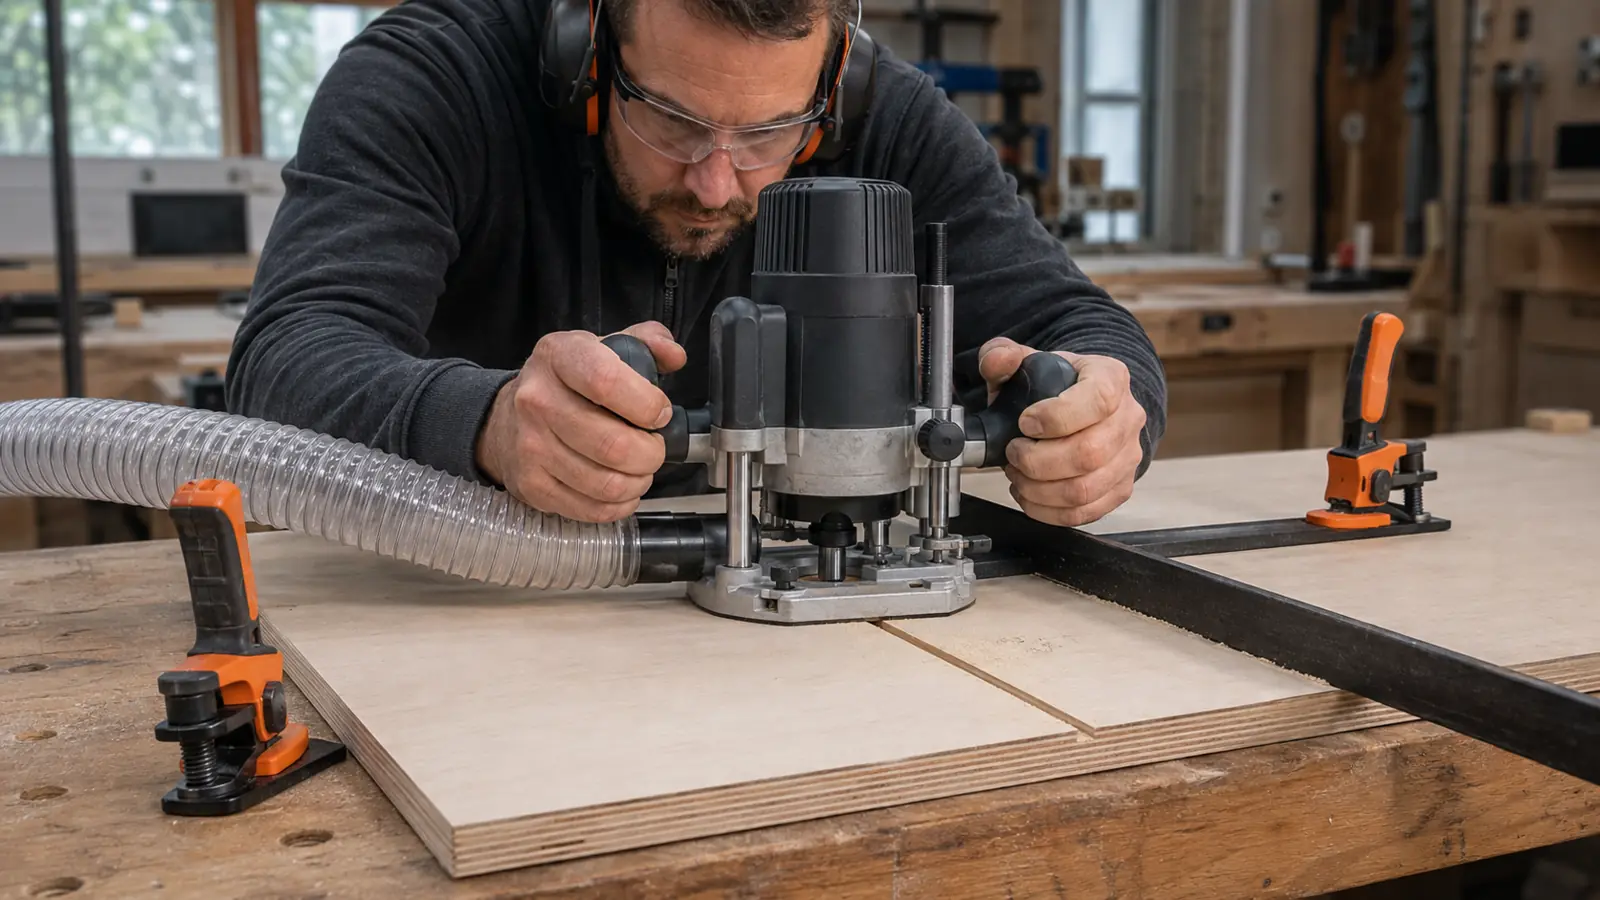
Using a handheld router
For a handheld router, the base must remain fully supported and the workpiece must not move. Use a clamped straightedge for dados and grooves. Take controlled passes rather than forcing the cutter to remove the full depth at once. Keep both hands on the handles while the bit is moving and wait for it to stop completely before setting the router down.
Diameter, shank and cutting length
Cutting diameter
A smaller diameter creates a narrow kerf and reaches tighter internal corners, but the tool is less rigid and has less room for chip evacuation. A larger diameter is stiffer and can tolerate higher production loads when the router, collet and toolpath permit it. Do not select diameter from panel thickness alone; consider corner radius, machine power, cutting load and desired detail.
Shank diameter
Use only a shank size supported by the correct collet. A 1/2-inch shank is generally more rigid than a 1/4-inch shank for comparable tools, but it does not make an oversized cutter suitable for a small router. Never grip a shank in a collet of a different nominal size, and do not bottom the bit against the inside of the collet.
Cutting length and projection
The cutting edge must cover the programmed depth, but an unnecessarily long bit increases deflection and chatter. Use the shortest cutter that safely clears the work. Insert the shank to the manufacturer’s minimum engagement while leaving a small clearance from the bottom of the collet. Never clamp on the flutes or on the transition between the shank and cutting section.
Flute count
Two-flute solid-carbide spiral bits are a common general-purpose option for plywood. More flutes provide more cutting edges, but they also reduce flute space and change the feed required to maintain chip thickness. Flute count, RPM and feed must be considered together rather than chosen independently.
A conservative starting method
- Identify the exact panel. Record plywood type, measured thickness and which faces must remain visible.
- Define the operation. Separate through-cuts from grooves, pockets, template work and edge profiles.
- Check the complete tool specification. Confirm diameter, shank, cutting length, flute direction, flute count, maximum RPM and intended material.
- Verify the setup. Inspect the collet, tool cleanliness, projection, runout, workholding, spoilboard or straightedge and extraction.
- Start from manufacturer data. Use the cutter maker’s recommended range for the exact tool and material. Do not copy a universal RPM or feed from a different diameter or flute count.
- Test on representative scrap. Use plywood from the same sheet or batch when possible.
- Inspect both faces and the chips. Look for veneer lifting, fuzzy edges, burning, chatter, packed dust and tool heating.
- Change one variable at a time. This makes the result traceable and prevents several adjustments from hiding the real cause.
For a cautious calculation workflow, use Speeds and feeds: a conservative beginner method and verify the result against the manufacturer’s data.
Safety note: Disconnect power before changing a bit. Confirm that the router, collet and cutter are compatible, and never exceed the tool manufacturer’s maximum RPM. Use eye and hearing protection, effective dust extraction and respiratory protection appropriate to the dust exposure. Stop immediately for smoke, unusual vibration, a loose workpiece, a damaged cutter or abnormal sound.
Troubleshooting plywood cuts
| Symptom | Likely causes | Checks and corrections |
|---|---|---|
| Chipped top veneer | Upcut action at the surface, dull edge, weak veneer or excessive runout | Try a sharp downcut or correctly engaged compression bit; inspect the collet and test on scrap |
| Chipped bottom veneer | Downcut action at the bottom, poor support or breakout on the final pass | Support the underside and consider a correctly engaged compression bit for through-cuts |
| Burn marks | Dull bit, rubbing, slow feed, excessive RPM, deep pass or recutting trapped chips | Stop and inspect the tool, evacuation and settings; change only one factor at a time |
| Fuzzy edge | Unsuitable flute direction, dull cutter, weak face veneer or unsupported fibres | Protect the visible face with the correct cutting direction and make a controlled finishing pass |
| Chatter or wavy edge | Excessive projection, runout, loose workholding, flexible machine or aggressive cutting load | Shorten projection, inspect the collet, reinforce hold-down and reduce the load within manufacturer guidance |
| Packed groove | Downcut geometry, insufficient extraction or too much depth per pass | Improve evacuation, use shallower passes or select an upcut when the surface requirements allow it |
| Part moves near the end | Insufficient hold-down or loss of support during the final contour | Add suitable clamps, tabs, vacuum or an onion-skin strategy; never rely on cutter direction alone |
If the edge turns dark or the router begins producing unusually fine dust, see Why does a CNC router burn wood?
Frequently asked questions
What is the best all-around router bit for plywood?
There is no single best bit for every plywood operation. A two-flute solid-carbide spiral is a practical general category. Choose upcut for evacuation, downcut for the top face and compression for through-cuts where both faces matter and the transition is correctly engaged.
Is a compression bit always best for plywood?
No. It is excellent for full-depth cuts with two visible faces, but it can be the wrong choice for thin sheets, shallow grooves or a first pass that does not bury its upcut section. In those cases, a downcut, upcut or mortise-compression design may be more appropriate.
Can I cut plywood with a straight router bit?
Yes. A sharp carbide straight bit can make dados, template cuts and profiles. A spiral bit is usually preferred for demanding plywood work because its continuous shearing action and controlled chip direction can improve the result.
Which bit leaves the cleanest top surface?
A downcut spiral normally gives the cleanest top veneer. A compression bit can also protect the top face during a through-cut, provided its upcut section remains below that veneer.
Which bit is best for a plywood dado?
A downcut spiral is a strong starting choice for a shallow dado because it protects the top edges. For a deeper groove, monitor chip packing and use multiple passes. Select the diameter from the plywood’s measured thickness when the dado must fit the panel.
What size bit should I use for 3/4-inch plywood?
Panel thickness does not determine cutter diameter by itself. A 1/4-inch or 3/8-inch spiral is common for many routing tasks, while larger tools may suit production work on capable machines. For a fitted dado, measure the actual sheet because nominal 3/4-inch plywood is often thinner than 0.750 inch.
Can the same router bit be used in a CNC and a handheld router?
Only if the manufacturer approves the bit for both machines and the shank, collet, diameter, RPM range and cutting method are compatible. Some cutters are intended specifically for CNC or automatic-feed operation.
How deep should the first pass be with a compression bit?
It must be deeper than the tool’s complete upcut section so the downcut portion contacts the top veneer. The required depth is tool-specific. Read the manufacturer’s dimensioned drawing and do not assume a universal value.
Final recommendation
Choose the cutter from the operation and the surface requirement, not from plywood thickness alone. Use a downcut spiral for a clean top edge in blind work, an upcut for effective evacuation in deep cuts, and a compression spiral for clean through-cuts on both faces when its transition is correctly positioned inside the sheet. Keep the bit sharp, minimize projection, hold the work securely and validate every setup on representative scrap.
Find a compatible router bit
Select your machine, plywood operation and dimensions to narrow the compatible tool geometries. The result is a starting recommendation and must still be checked against the cutter manufacturer’s data.
Technical references
- Freud Tools — Up Spiral Bit: intended uses and chip-removal characteristics.
- Freud Tools — Down Spiral Bit: grooves, dadoes and surface-edge use.
- Freud Tools — Compression Spiral Bit: opposing shear directions for double-sided materials.
- Whiteside — Compression Spiral: upcut and downcut edges for both faces.
- Whiteside — Undersize Plywood Dado Set: cutter sizes intended to match common plywood thicknesses.
- LMT Onsrud — Cutting Data Recommendations: manufacturer starting data by tool and material family.
Editorial note: This guide explains selection principles and cautious starting methods. It does not replace the router, collet or cutting-tool manufacturer’s instructions. External references are provided for technical verification and are not endorsements.
The stated parameters are starting points. Test progressively on scrap and always respect manufacturer limits.